This article is devoted to working with the Settings section in a test company.
If you work for your own company, follow the link.
The SETTINGS section allows you to create a user structure that will be used for group assignment of access to content and uploading reports for specified groups.
The initial structure in the test company consists of one root group "Company Name" and a group "Demo" included in it.
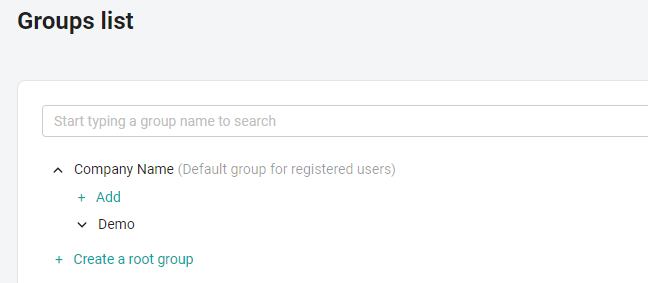
The existing structure can be adjusted if necessary:
to delete a group, hover the cursor over it and click on the trash icon that appears at the end of the line;
to edit the name, use the pencil icon.

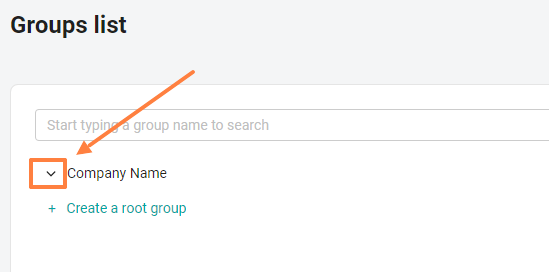
To continue working with the system, you need to enter the name of your company.
To do this, follow the instructions:
1. Click the down arrow to the left of the root group "Company Name".
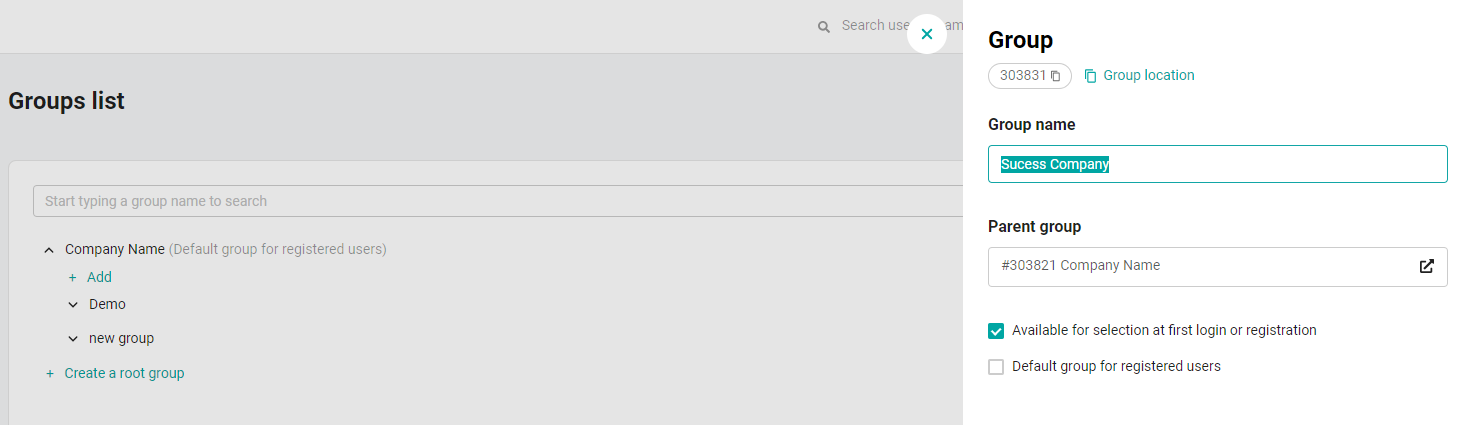
Great! The simplest user structure has been created. Now, when setting up group access, select this group so that only your employees are assigned to the content you created, and other users do not see it. And vice versa, if you want to hide content from your users' access that your employees don't need, uncheck the box next to your company's name in the settings for access to such content.

To create a more complex structure, you need to think about which groups content will be assigned and reports will be uploaded: by positions, departments, regions, streams, work experience in the company or all these criteria at the same time. Below we will consider possible cases.
Case 1. Assignment by flow
Every month new employees come to the company and form streams. In training reporting, you want to see a breakdown by these streams.
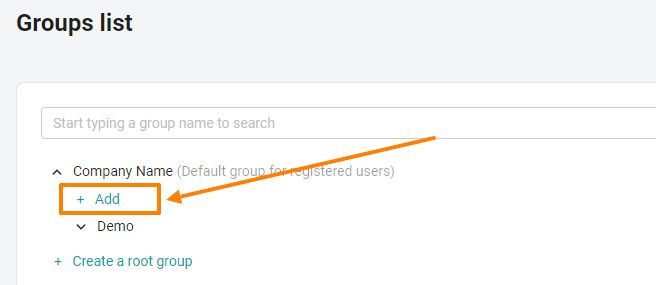
Create groups with thread names inside the group with the name of your company (the "add" button under the name of your company).

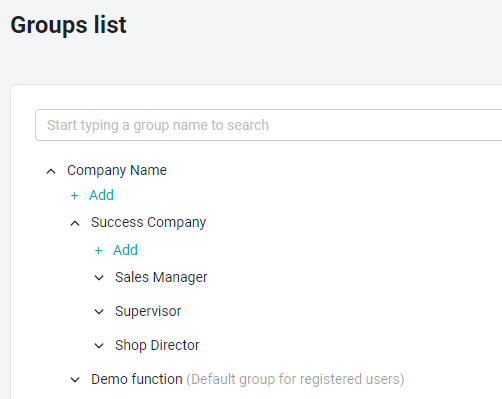
Each employee of the company holds a certain position, depending on which different content will be assigned.
Create groups with job titles inside the group with the name of your company (the "add" button under the name of your company).
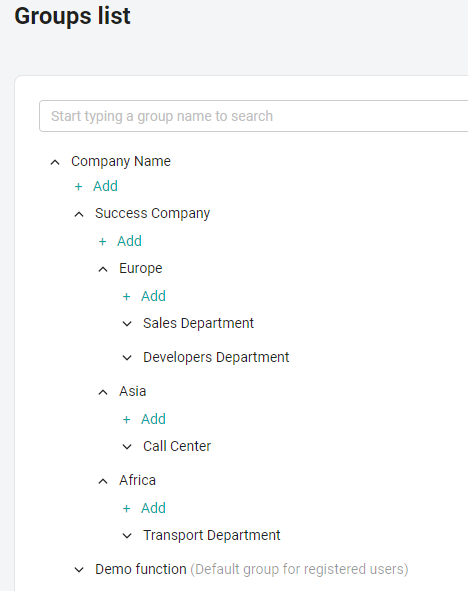
The company has branches in several regions, each of which is divided into departments. Assigning access to content and uploading statistics takes place on the basis of a department or an entire region, depending on the task.
Create groups with the names of regions inside the group with the name of your company (the "add" button under the name of your company).
Then create groups with department names inside the group with the name of the region (the "add" button under the name of the region).
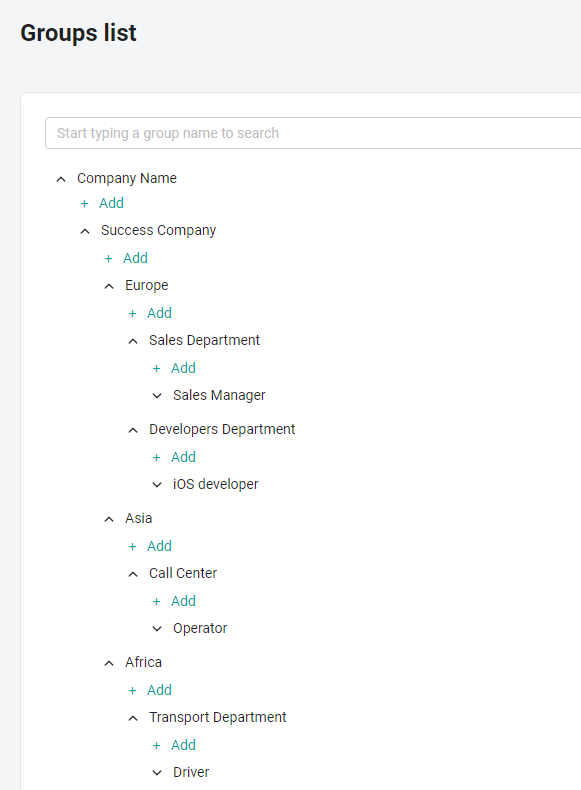
The company has branches in several regions, each of which is divided into departments, within which employees with certain positions work. Assigning access to content and uploading statistics takes place on the basis of a position, department or a whole region, depending on the task.
Create groups with the names of regions inside the group with the name of your company (the "add" button under the name of your company).
Then create groups with department names inside the group with the name of the region (the "add" button under the name of the region).
After that, create groups with job titles inside the group with the department name (the "add" button under the department name).
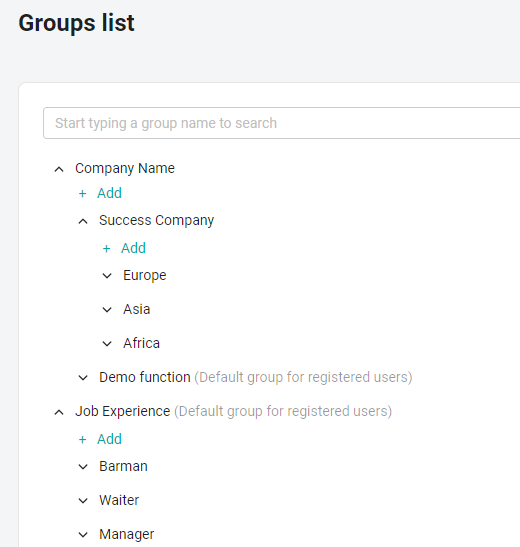
The company has branches in several regions, each of which employs employees with similar positions. Assigning access to content and uploading statistics is based on the region and/or position.
Create groups with the names of regions inside the group with the name of your company (the "add" button under the name of your company).
Then create a root group with the name "Posts" (the "add root group" button).
Inside it, create groups with job titles (the "add" button under the "Posts" root group).
Disadvantages of a case with two root groups: you will NOT be able to assign a course in the Moscow region to a bartender and a waiter, and in the Rostov region only to a waiter (if there is such a need, use a structure with one root, where the position is included in the region).
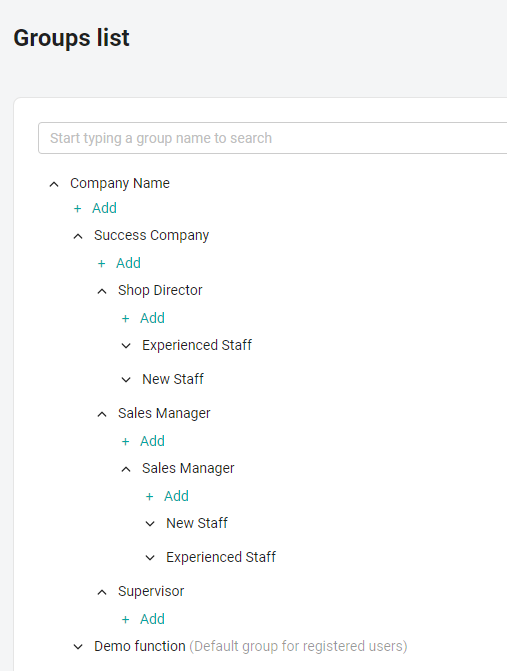
Case 6. Appointment by position and work experience (one root group)
Each employee of the company holds a certain position. Depending on this position and work experience in the company, various content will be assigned (for beginners – adaptation courses, for experienced – courses in the specialty).
Create groups with job titles inside the group with the name of your company (the "add" button under the name of your company).
Then create groups with the names of the length of service within the group with the title of the position (the "add" button under the title of the position).
Advantages of a case with one root group: you can assign a course simultaneously to sales managers – experienced employees and supervisors-beginners.
Disadvantages of a case with one root group: if it is necessary to assign a course to all beginners, then it will be necessary to select the "beginner" group within each position. If there are a lot of posts, it will take a long time.
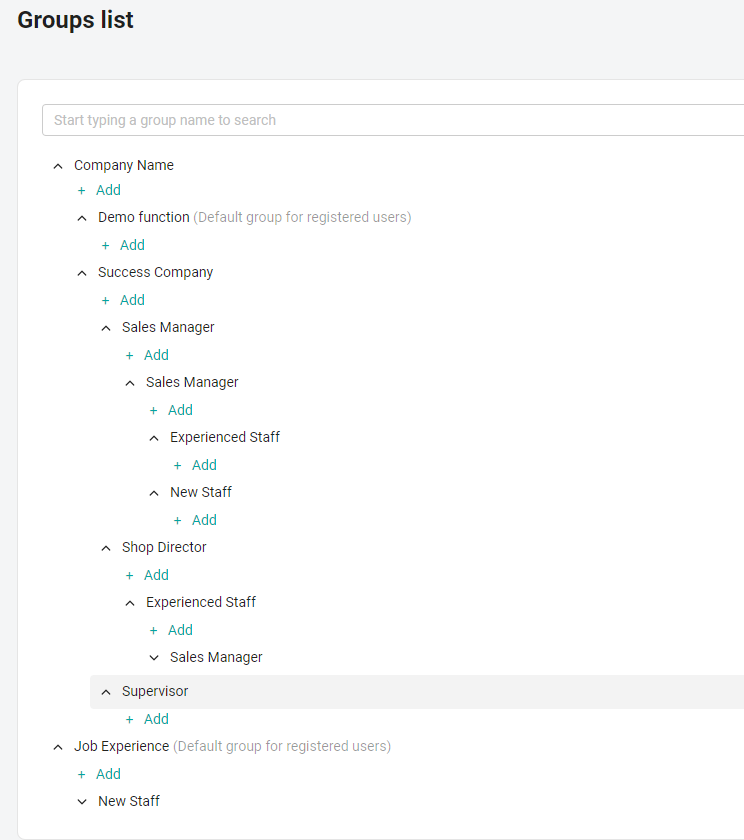
Case 7. Appointment by position and work experience (two root groups)
Each employee of the company holds a certain position. Depending on this position and work experience in the company, various content will be assigned (for beginners – adaptation courses, for experienced – courses in the specialty).
Create groups with job titles inside the group with the name of your company (the "add" button under the name of your company).
Then create a root group with the name "Work experience" (the "add root group" button).
Inside it, create groups with the names of work experience (the "add" button under the root group "Work experience").
Advantages of a case with two root groups: if you need to assign a course to all beginners, it will be enough to select the "beginner" group in the "Work Experience" root group so that newcomers of all positions in the system get access.
Disadvantages of a case with two root groups: you CANNOT assign a course simultaneously to sales managers – experienced employees and supervisors-beginners (if there is such a need, use a structure with one root, as in case 6).
The above cases are designed to help you understand how the functionality works, but they do not limit you in the names of groups and their combinations, of which there may be a lot more: knowledge of languages, category of driver's license, skill level, address or name of place of work. Focus on your internal structure when creating groups. If you need recommendations on the formation of the most successful structure for your company, you can contact technical support.