How do I create and configure groups?
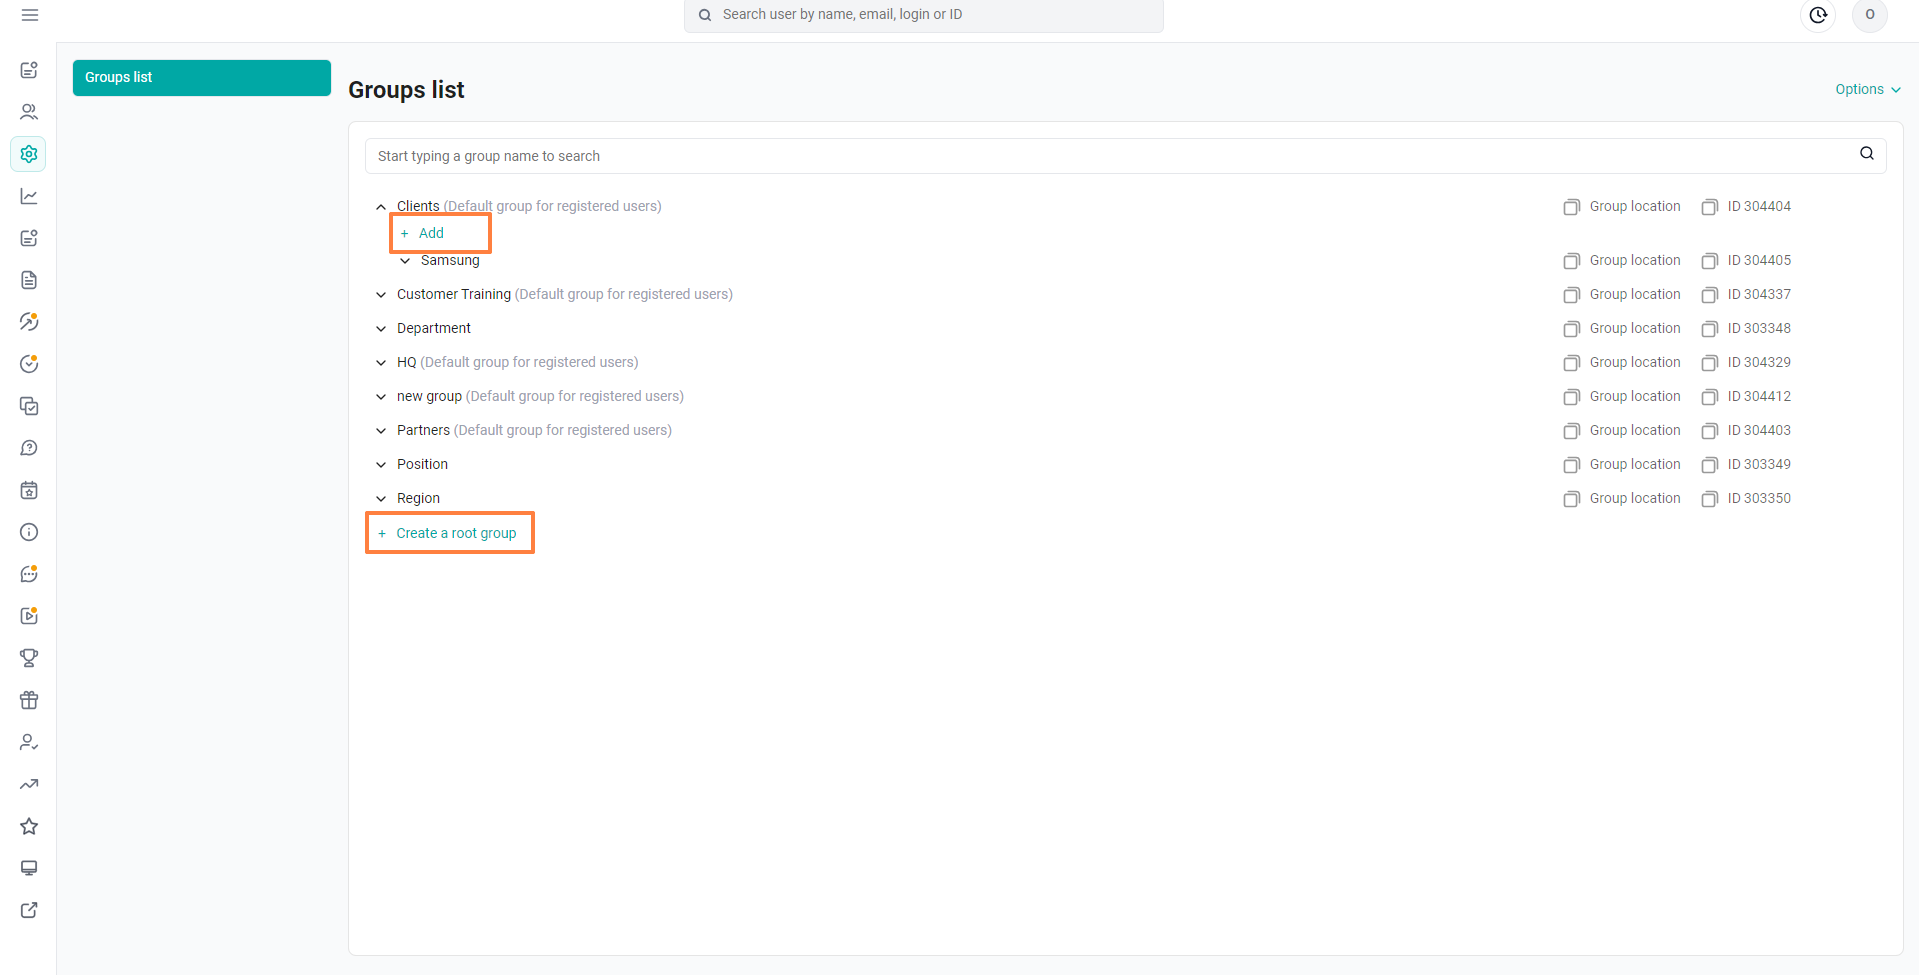
In the section with group settings, there is a list of company groups. All groups are divided by type. The names of the group types (group aliases) are set by the superadministrator in the company settings.
Select the SETTINGS section in the side menu, and go to the categories menu.
Note: The names and number of groups may differ, they are configured by the platform administrators
You can add, edit and delete groups in each of the categories using the corresponding buttons.
Note: It is important to correctly identify user groups in order to initially provide them with access to materials in the platform. If you skip this step and go straight to creating a user profile, then you simply will not be able to save it.
Groups can be added and edited in 2 ways:
1. Import groups.
To add a large number of groups to the system or edit existing groups, the "Import" button is located in the upper right corner of the group list screen in the "Options" menu.
By clicking on the "Import" button, a pop-up window "Import groups" appears.
The administrator is given the opportunity to select a file to import by clicking on the "Select file" button. Before importing a file into the system, it is suggested to download a template with a sample of filling in the import file "Template".xlsx
There are 3 ways to edit group values:
Specifying the Group ID,
Specifying the full path to the group,
Specifying the name of the group
To edit a group, it is enough to set at least one of the three columns for the specified tree, and the remaining columns can not be filled in. If more than one column has been filled in, then the group is identified by the value of the higher priority column:
ID takes precedence over the full path, the full path takes precedence over the group name.
A detailed analysis of the import is available at the link: How to fill in the group import template in the "Settings" section
2. Adding and editing groups "manually"
Example of adding a group manually

Expand the list of functionality in the Region category and click on the +Add button.
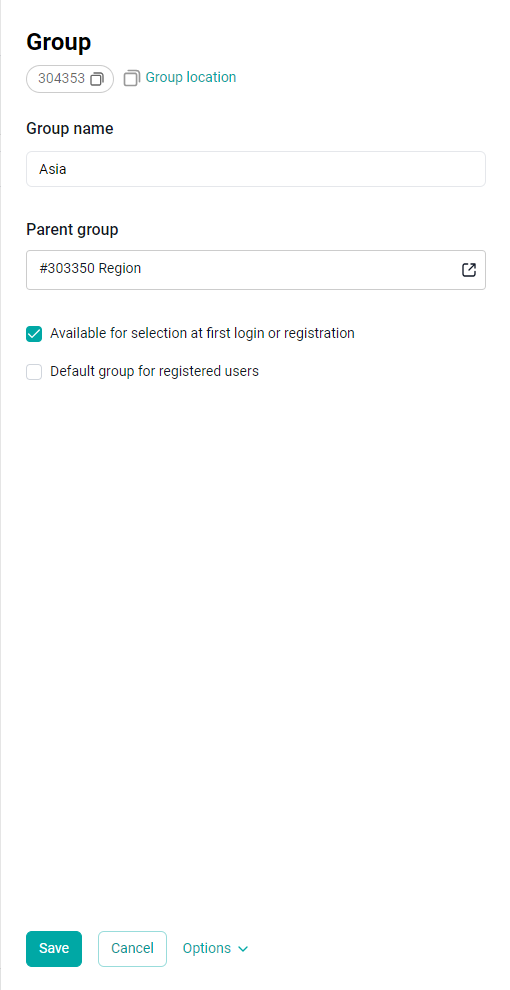
In the context menu Group, enter the name of the region in the text field, for example, "Volgograd region".The check mark "The group can be selected at the first login" (set by default) indicates to the user the ability to select the group independently during registration or at the first login after generation (if the corresponding flag was set during generation).
Click Save.
The created region will appear in the list of groups.
To search for the desired group, enter the search query in the search bar and press the enter button on the keyboard.
To change the name of a group or delete it, hover the cursor over the group and select the edit button.
In the context menu of the Group, change its name and save the changes by clicking the Save button.
To delete a group, click the Delete button in the Options menu, and select Done in the confirmation window.
It is possible to delete a group from the list. To do this, hover the cursor over the group, select the delete button and confirm the action.
When trying to delete a group (even without users!) that is available in the correspondence table in the AUTO-ASSIGNMENT OF GROUPS section, an error is displayed: "This group is filled in automatically. To delete it, delete the records containing it from the correspondence table."
If you try to delete a group containing child groups, the subgroups will also be deleted.
Clicking on the down arrow button next to the name of the region will allow you to add a city to the region.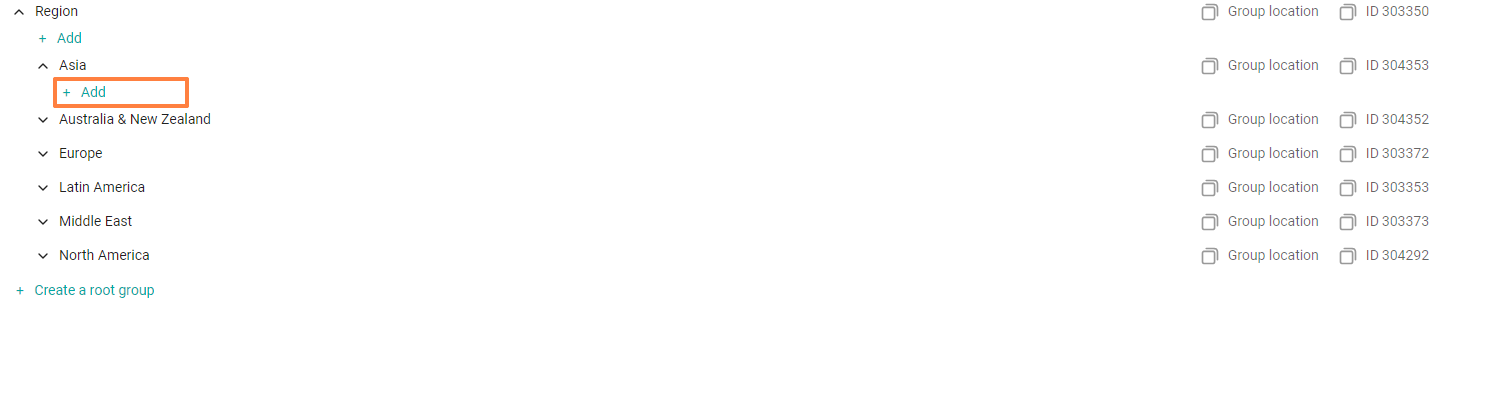
Adding cities to a region is done in the same way as adding regions. Click on the +Add button in the region and follow the steps described above.
In the same way, add groups for all types of groups.
Note: When any branch of the tree is opened, the first 50 values in this branch are loaded. If there are more values in the branch, the Show More button is displayed on the 51st line. By clicking on it, the following 50 elements are loaded. During the download, a loading indicator is displayed next to the button. If all the groups are loaded, the Show button is not displayed yet.
After adding all types of groups, you can proceed to creating user accounts.