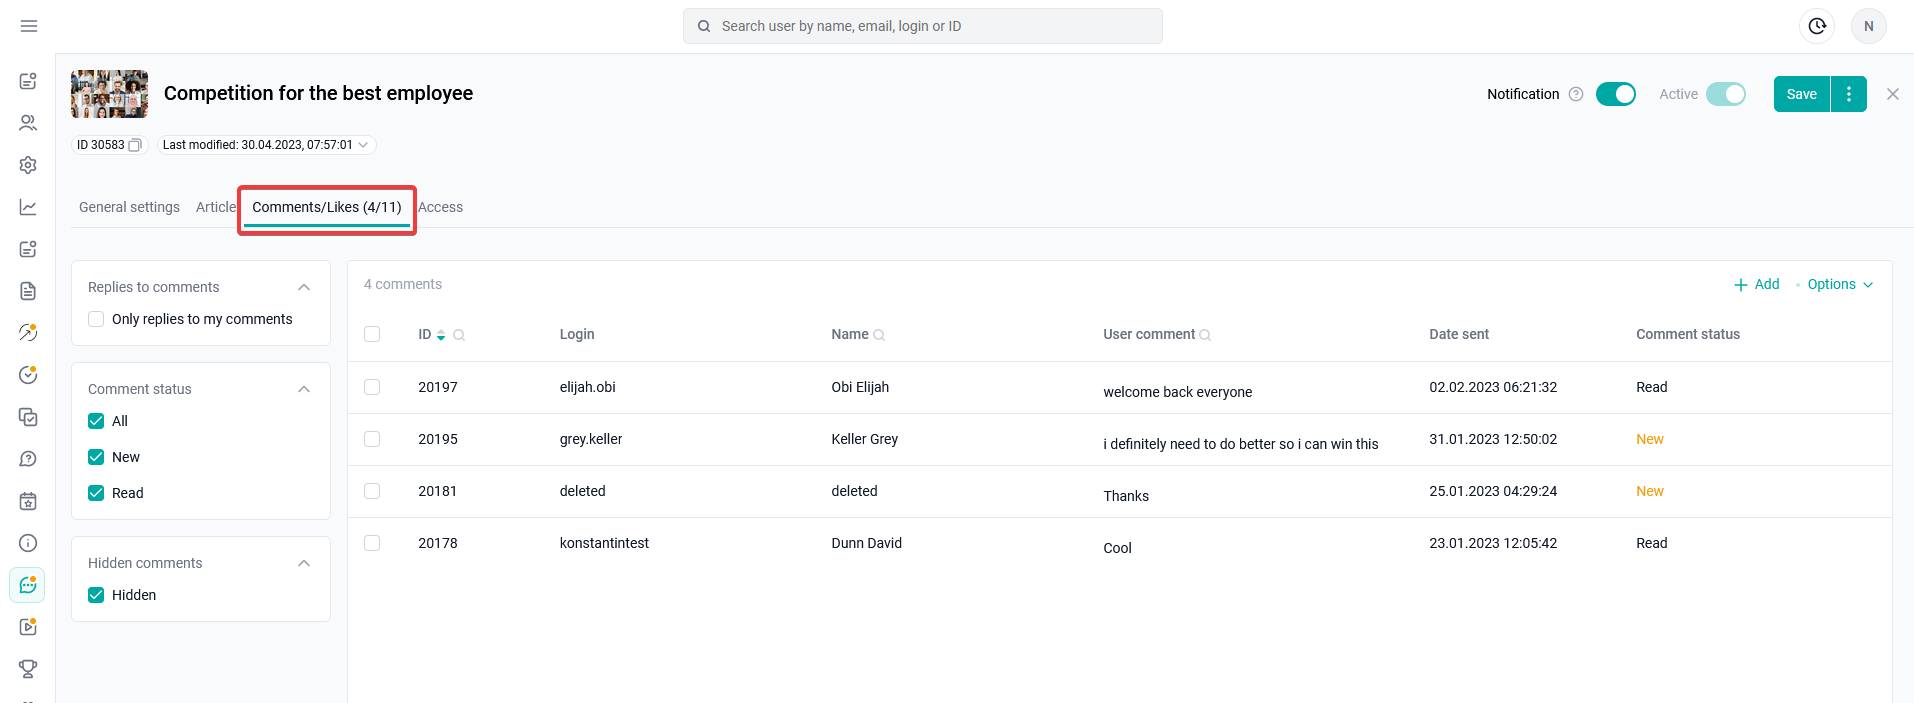
Go to the MESSAGES to message section. Select the COMMENTS AND LIKES tab to view user comments and leave a comment.
Note: If the "Allow comments to this message" checkbox was not set in the main settings, then a hint is displayed above the table with comments: "Adding comments to a message is prohibited. You can enable comments in the message settings." At the same time, the text "message settings" is clickable, clicking on it takes you to the MAIN SETTINGS tab of the current message.
If the user who left a comment lost access to the message, his comment will still be counted and displayed. Blocking the user also does not affect the display of the comment. If the user has been deleted, the value "deleted" is sent instead of his name and login. The comment is not deleted.
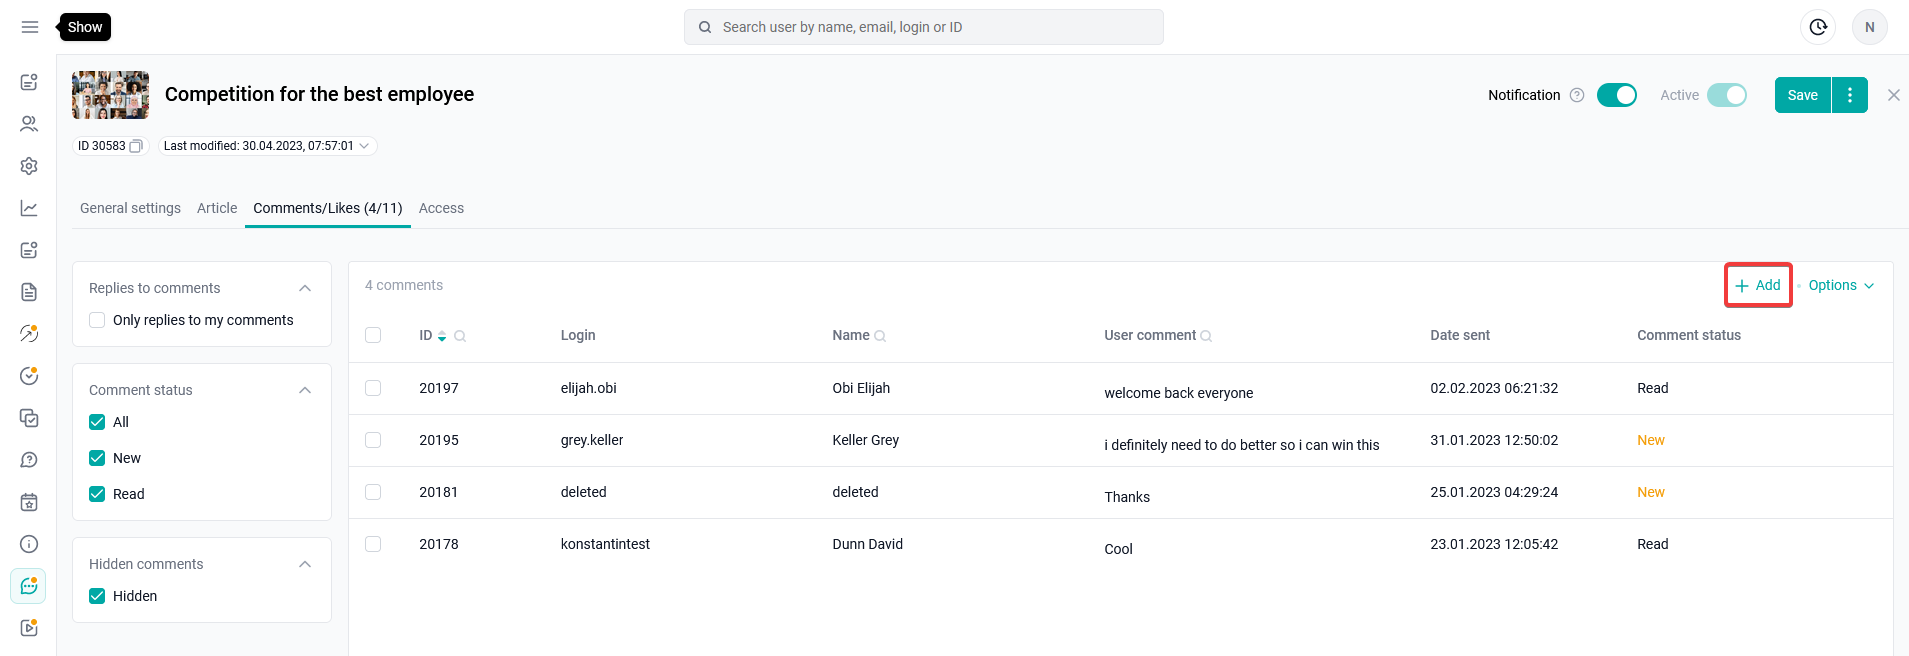
To create an administrator comment, click Add +.
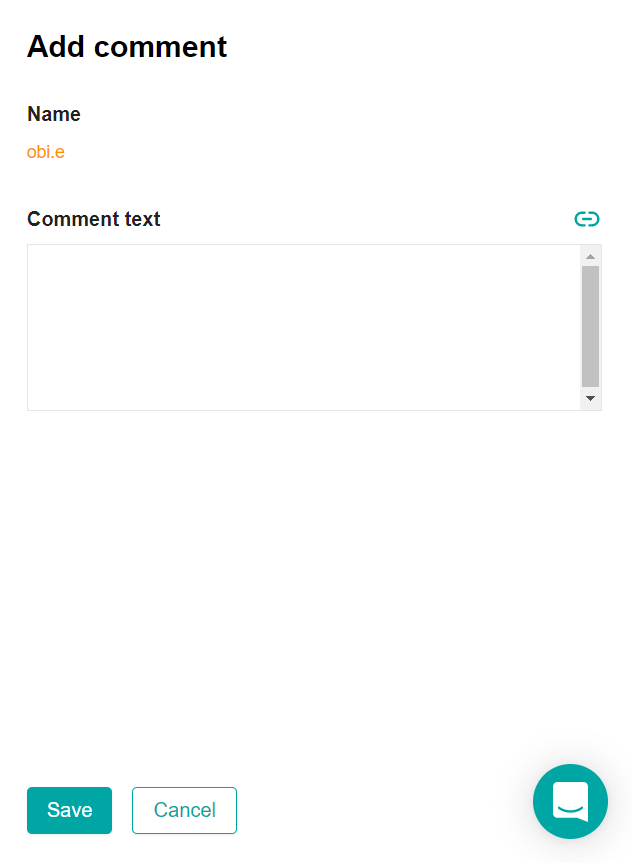
Enter the comment text in the field (max. 1000 characters). The comment field supports adding internal and external links.
Note: When specifying a link, within the limit of 1000 characters, only the displayed link name is taken into account. Taking into account the link code, the limit is 2000 characters.Click Save Changes.
You can view user comments from the comment cards or export data on them.
Click on the comment line to go to its card.
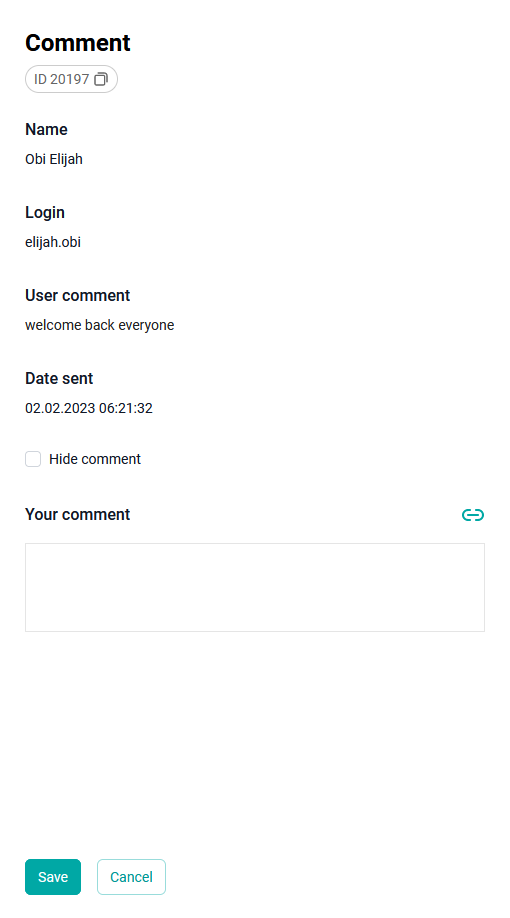
If you don't want the user's comment to be displayed in the app, check the Hide comment box. In this case, the comment will be displayed in the administrative panel with the status "Hidden", and it will not be displayed at all on the platform.
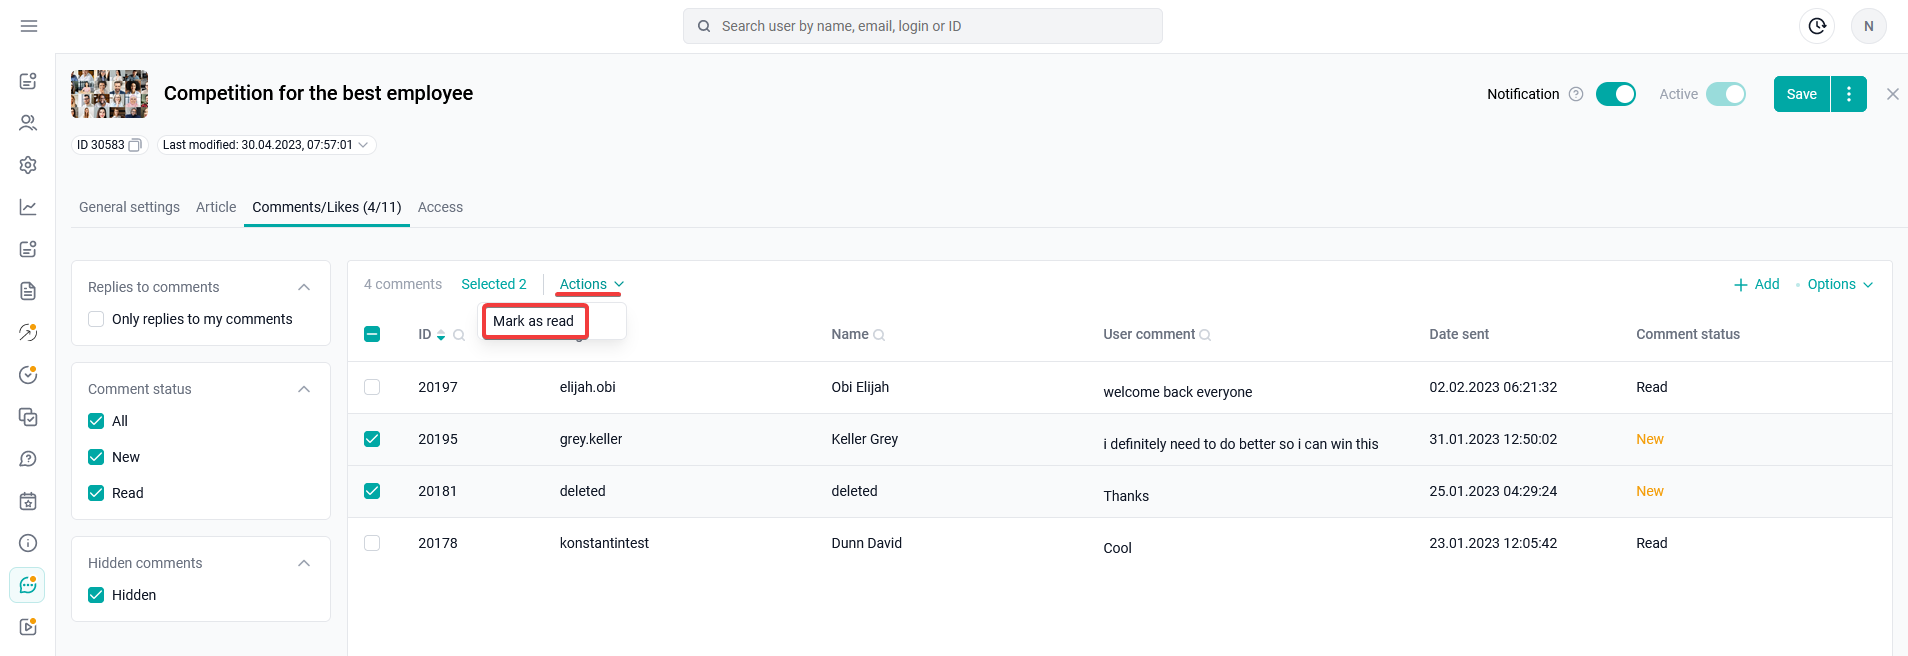
Check the box next to the comments that you want to mark as read. In the Actions drop-down menu that appears, click Mark as Read, and select Done in the confirmation window.
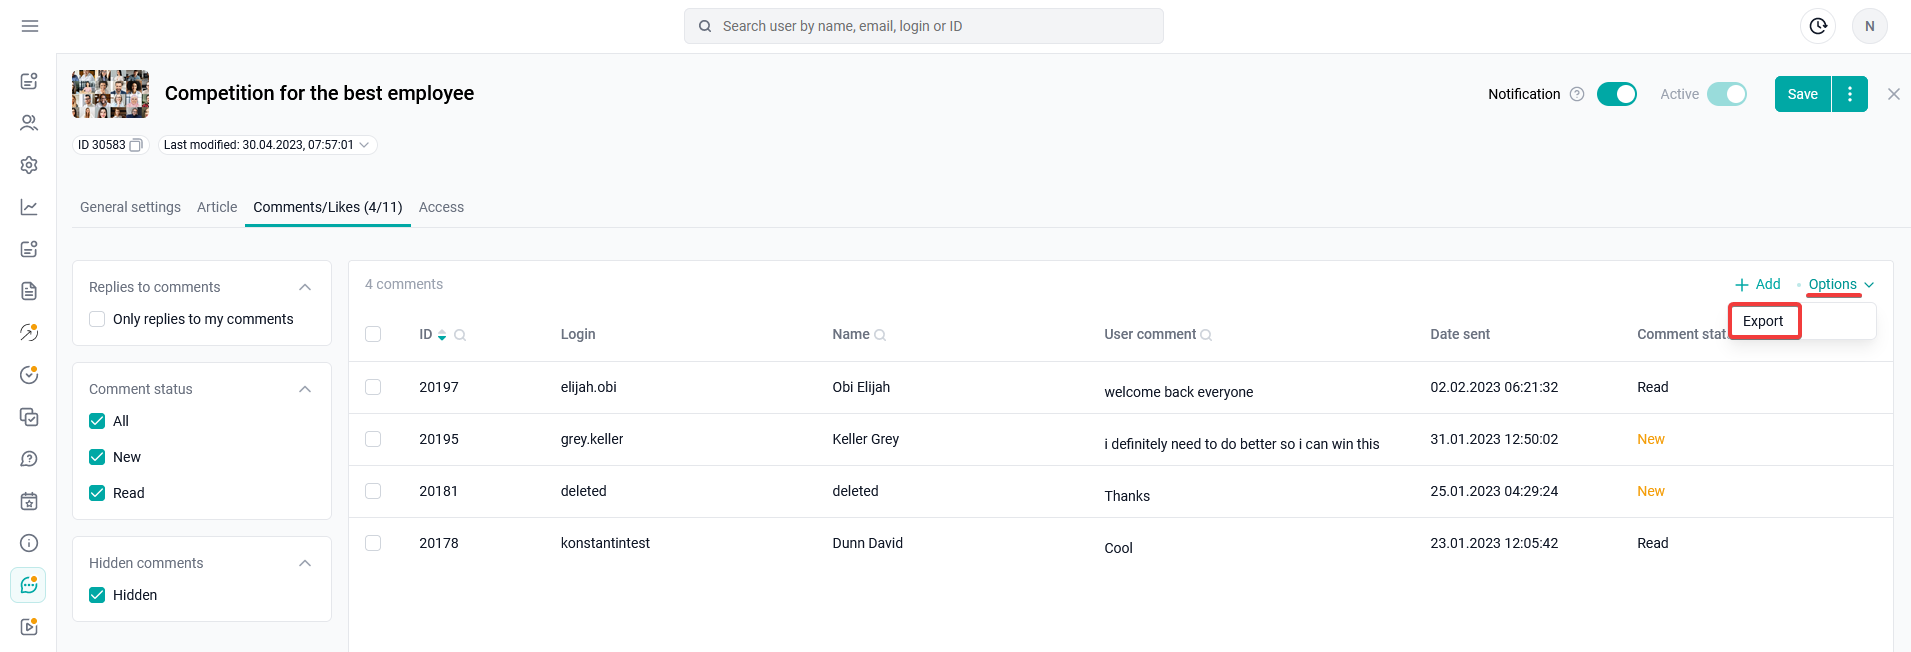
Click the Export button in the Options menu.
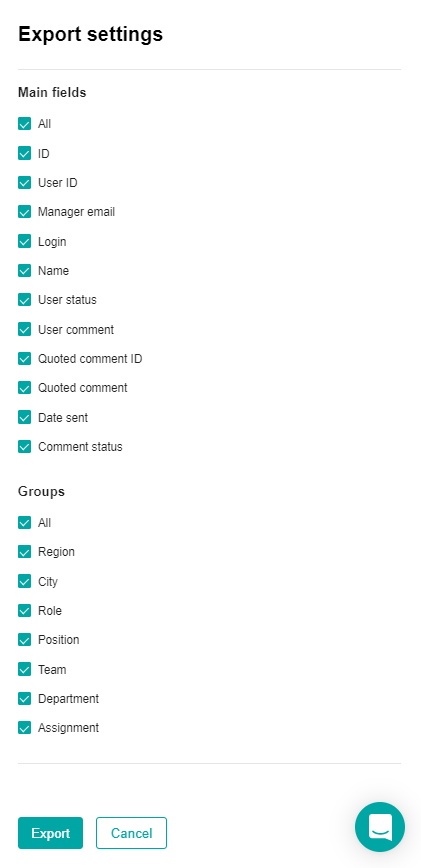
Uncheck the fields for which you do not want to export information, or leave everything selected. The checkbox removes/selects all fields of this category.
Click Export. Data export will start in the background. You can view the running process in the All processes window.
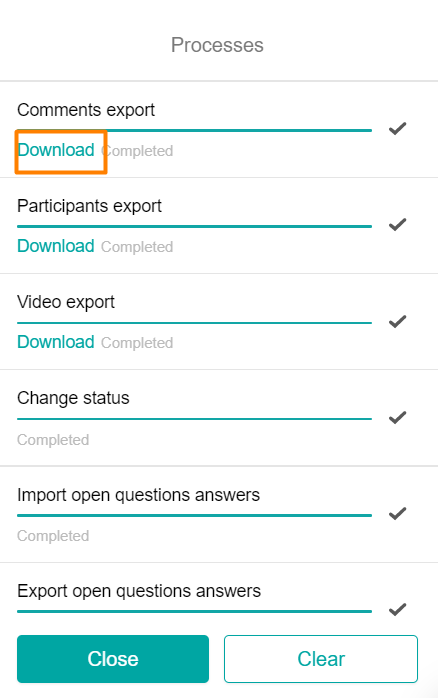
When the process is complete, click Download. The export file will be downloaded to your computer.
Errors: The system will not start exporting and will issue a warning if no field is selected.