In the APPLICATIONS AND VISITS tab, participants of the event are added, as well as application statuses are managed.
This tab is used for event attendance analytics.
If the "Confirm participation" function was specified on the "settings" tab - "Yes" - all applications for participation in the event from users are processed by the administrator on the current tab.And until he processes the application, the user will not be able to see the link to the event and participate in it.
If the "Confirm participation" function was specified on the "settings" tab - "No" - all applications for participation in the event are automatically displayed on this tab with the status "Approved".
Also, the administrator can independently upload employees to this table via the "options" or "add" button.
In the screenshot:
The table above is the users who have submitted an application for the event and the administrator needs to approve or reject it (process it).
The table below shows the users who actually attended the zoom event. This table is displayed only for the event zoom.
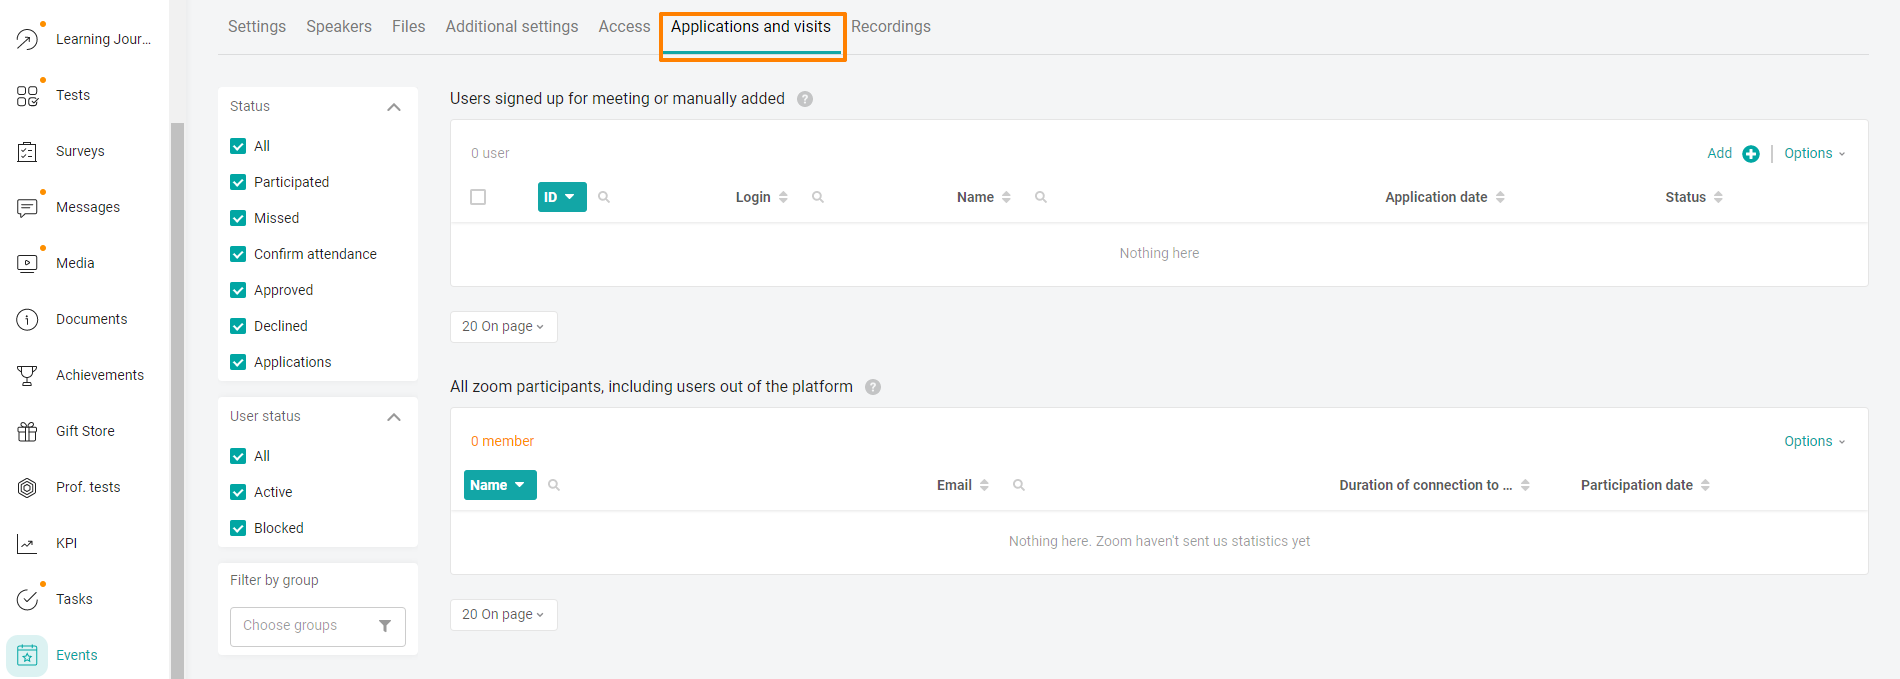
To add an event participant, click the Add + button.

In the window with a list of all company users, select users by clicking the Select button in the user cell.
You can use the column search function of the table. To do this, click on the magnifying glass next to the column name, enter the id, login, email or employee name, and select it in the search results.
The selected users will appear in the table with the corresponding status. The status depends on the type and date of the event (see below in the description of the status logic).
Note: When you select users to whom the event was unavailable, access to it is automatically assigned. In this case, the participant will be displayed in the list of individual access in the ACCESS tab. When deleting participants, their individual access is not taken away.
Events of the "Online conference in Zoom" type have an additional table "All participants, including unauthorized on the platform", which the connected participants of the conference get into. This table shows everyone who clicked the link to the Zoom conference — even those users who are not registered on the platform.
The following information is displayed in the table:
The" name " of the user (by default, the table is sorted alphabetically in ascending order). The user ID is also displayed for users of the mobile application. For users of the web version, the id is not displayed.
The user's "Email" ,
"Duration" of participation:
0 - the user has not yet attended the event;
the value of the duration of the visit - if any.
"Connection date".
For events of the "Online conference in Zoom" type, the "Update data from Zoom"button is located in the header of the table with the list of actual participants of the conference. By clicking on it, statistics on participants are updated, while during synchronization, a spinner is displayed next to the button.
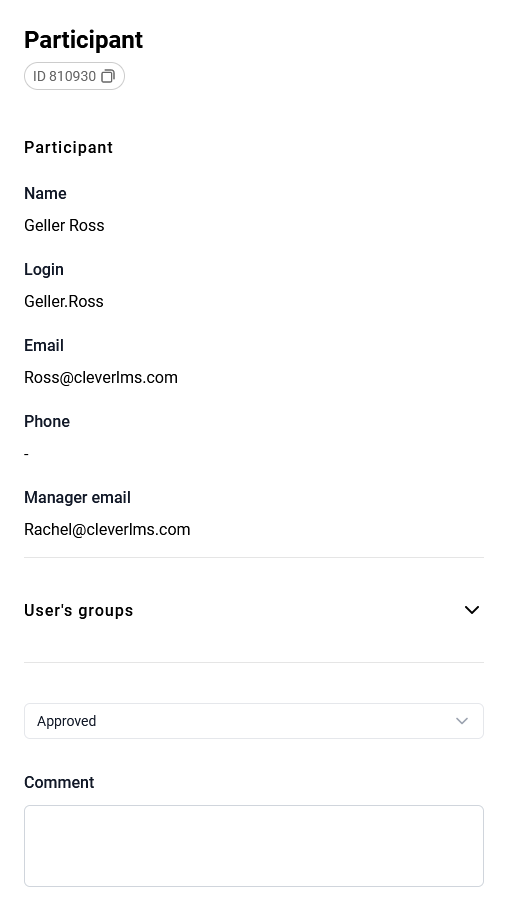
To view the information on the application, click on the cell of the participant of interest. Here you can change the user's status and leave a comment. The comment is displayed in the application along with the application status.
The logic of the application statuses is as follows:
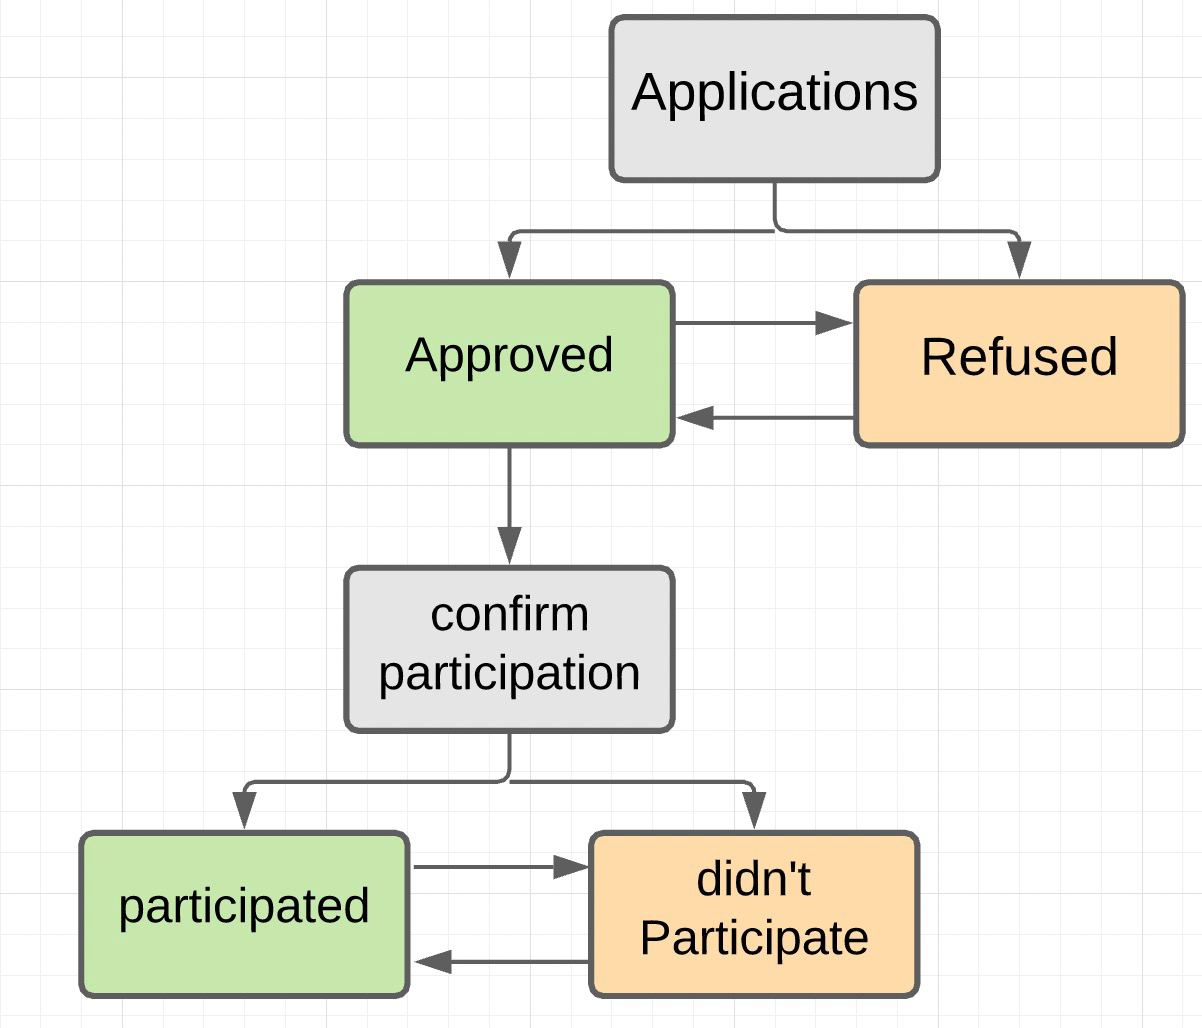
New user applications from the application get the status "Applications" or the status "Approved", depending on the value of the Confirm participation setting.
New participants of the event added through the admin panel (using the Add participant button) get the status "Approved" if the event has not yet occurred or the event has no date, the status "Participated" - if the event has occurred.
After the event date, all applications in the "Applications" status are automatically moved to the "Refused" status, and all applications in the "Approved" status are moved to the "Confirm participation"status.
From the "Applications" status, you can change the status to "Approved" or "Refused".
From the "Approved" status, you can change the status to "Refused".
From the "Confirm participation" status, you can change the status to "Participated" or "Absent".
From the "Participated" status, you can change the status to "Absent".
From the "Absent" status, you can change the status to "Participated".
From the "Refused" status, you can change the status to "Approved" if the event has not yet occurred, or to "Confirm participation" if the event has already occurred.
Note: If the user's status has changed automatically, the comment left earlier will be deleted.
For more information about statuses, follow the link.