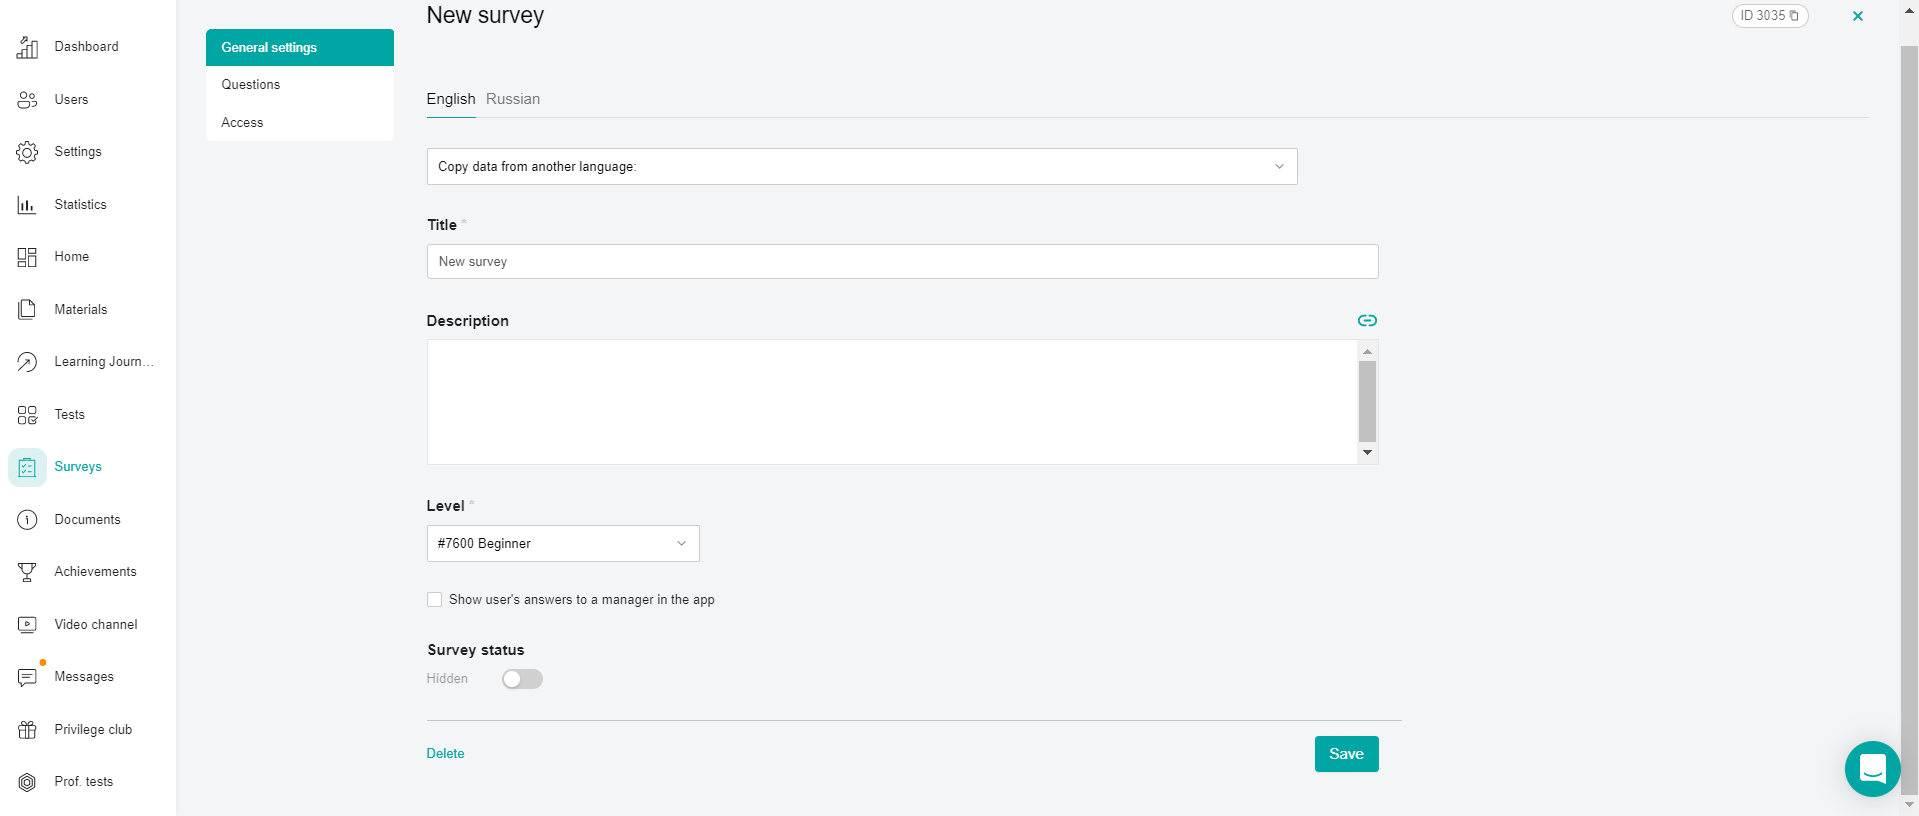
Fill in the Name and Description of the survey in the text fields, and select a pre-created Level.
The Description field supports the ability to insert links.
Links are added by clicking on the paper clip in the right corner of the text field.

By clicking on the button, a window opens:
Next, click on the arrow in the "Link type" field.
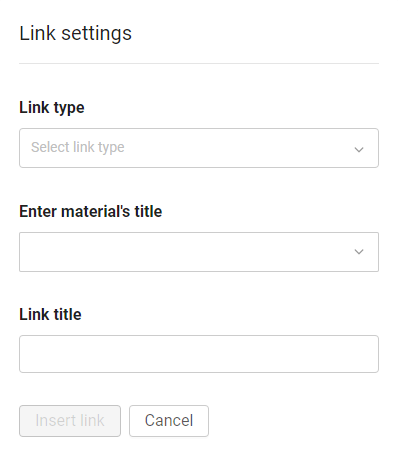
The links are divided into:
1. External - to any external source. For example, a link to a YouTube video.
In the link type, specify "External link".
"Insert an external link" - copy the link to the source in the address bar and paste it into our field.
Specify the "Link name". The text that will be clickable.
2.Internal - based on the material from the application. For example, for an introductory training program for beginners.
To do this, select the section in which the material for the link is located.
In the "Name of the material" field, we search and select it by name or id.
Specify the "Link name". The text that will be clickable.
Important: when you link to external or internal materials, you need to take into account that users have the same access in the material in which they posted the link and in the material to which the link leads.
The Show user responses to the manager check box in the app allows managers to view the details of the survey in the "My team" section .
The following fields are required: Name and Level.
The survey status shows the availability of the survey in the platform - whether it is visible to the user or not. It has two values "Hidden" or "Active".
Note: The Survey Status toggle is activated after filling out the entire survey. If several languages are enabled in the company, then you need to fill in all localizations. Switching the available content languages is located at the top of the form.
After filling in the basic settings, click Save Changes and proceed to the next stage of adding questions to the survey.